

7 Things You Need to Fix In Your Kitchen
How To Replace A Kitchen Sink Sprayer
Your kitchen is part of your house that is the most important but is also very hard to maintain. It is the area of your house that needs to be maintained on a daily basis. Keeping your kitchen clean, scrubbing the floors, wiping the countertops is just a part of maintenance. However, after some time is passed, there are going to be certain things that will break or get rusty. In any case, you should keep an eye out for such things that need to be fixed or replaced.
Unless you have just fixed your kitchen or have moved to a new place, your kitchen probably needs some touch-ups. What are the things in your kitchen that you should think about fixing? Here is a list of things that you may need to repair.
Faucets And Plumping
The faucets are often broken or rusty, and they don’t look good at all. No matter how clean your kitchen is, broken or rusty faucets can bring its vibe down. Replace the faucets so that you don’t have to repair them every other week.
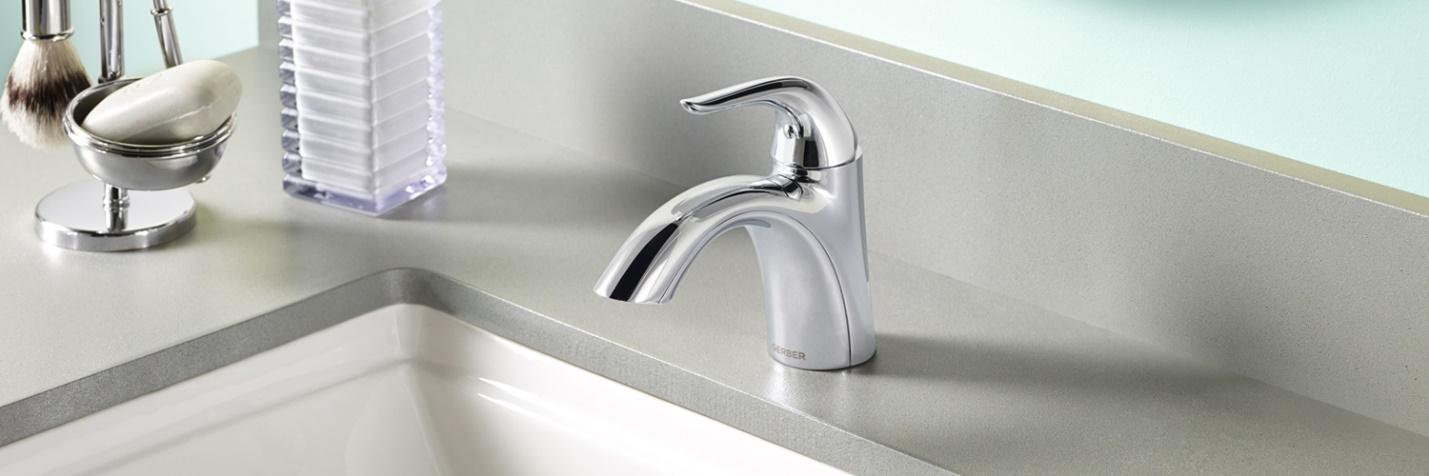
If you think the plumping of your kitchen always needs some repair, maybe it is time to get your water checked. Most of the times, it occurs because of had water. The calcium and magnesium in the water can cause buildup around the water fixtures. One solution for this type of water is to use it after filtering it. There are water softeners available that can do the job easily. Check out these water softeners that we recommend!
Cabinets
Your cabinets can give your kitchen a very clean look. I have experienced this myself, so I can guarantee that fixing your cabinets is going to be worth the money.

If your kitchen has a lot of cabinets, they are going to be responsible for making the kitchen appear a certain way. Dirty cabinets can show that the person living in the house is not interested enough in the kitchen. Perhaps the reason is that cabinets are not that hard to maintain. Wipe them with a wet cloth every other day, and they will stay clean. However, they will not stay like this forever. If your cabinets have broken knobs or hinges, you need to fix them as soon as possible. Broken hinges mean that your cabinet door will fall at any moment and your food containers won’t be safe form the pests/insects.
Drawers
While you are repairing your cabinets, don’t forget about the drawers. Drawers’ knobs can get broken. Repaint the drawers as well as it is the minor details that matter and can make a lot of difference.
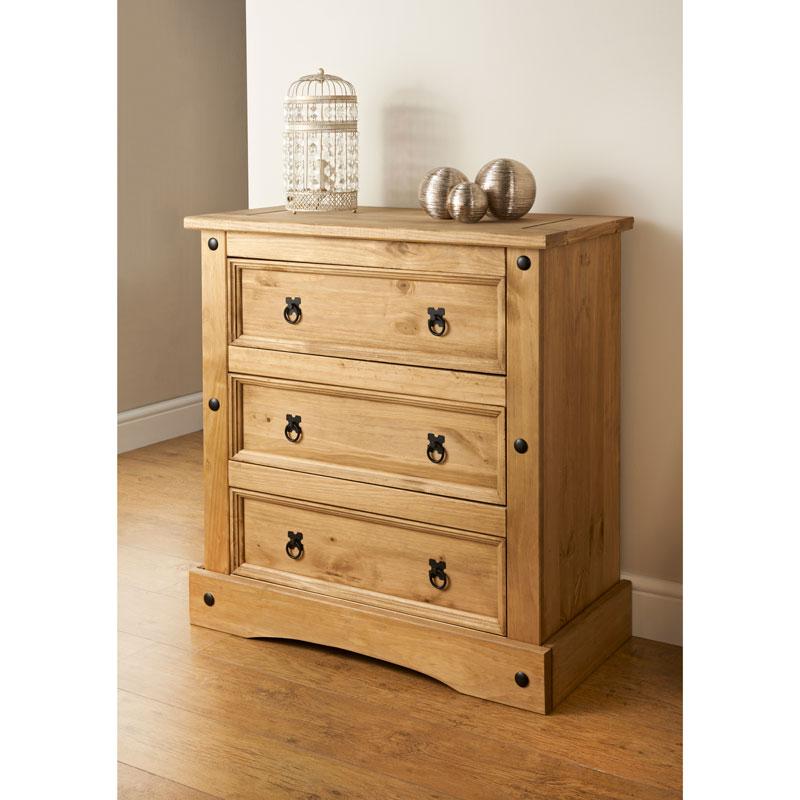
If your drawers are getting squeaky and rusty, and it is getting hard to move them, it is time to replace them or fix the root problem.
Countertops
Countertops in the kitchen can be tricky. They have to be cleaned once or even twice every day. Countertops in any kitchen are used the most. You use them to put utensils and even eat your snacks on them. A thin film of soap and oil formed on the countertops can be damaging. Sometimes countertops can get broken over time, and you need to repair those areas with the help of a professional.

People who have a small budget have the option to use laminated tops that are usually made of plastic. These laminated tops have different types. You get a variety of options that are also affordable. You can choose the tops of colors and textures.
Upgrade to stone, marble or any other more material that is more premium. If you have the budget, you can go for this option. It would be better not to choose solid tops if you are one of the people who replace them after some time.
Lighting
Lately, have you felt that your kitchen has gone grim? Or the lighting has somehow decreased? That means that your lighting needs to be repaired. New light fixtures can make a huge difference. Bright lights will brighten up space and make the kitchen look cleaner as well.

In other cases, if you notice that some of your lights are not working, you should replace the bulbs because broken lights can create a bad impression on a newcomer.
Flooring
The floor of a kitchen gets dirty quickly as compared to the flooring of the rest of the house. You spend a lot of time in the kitchen, and it also gets messy quickly. The kitchen floors can are covered with a film of oil as well if you don’t clean them regularly. This can make the floor dark in a short time.
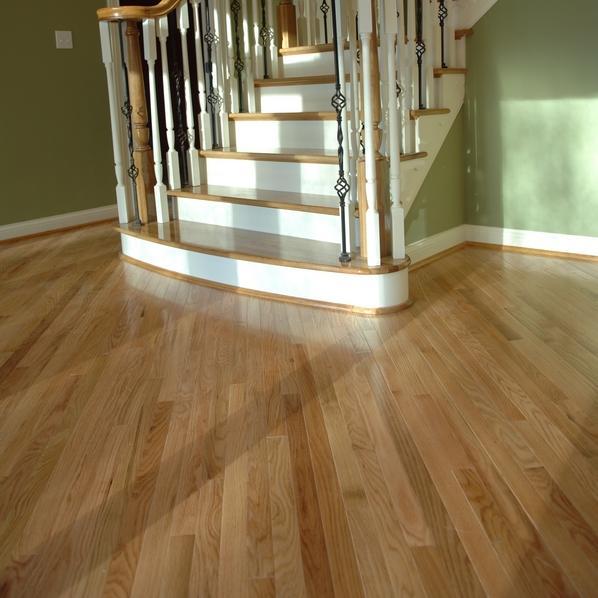
The kitchen floor tiles can also break away after a while. If you don’t repair them at once, they can get worse. If you want, you can buy plastic laminated tiles for the floor. It will save your energy and time. If you want a large budget, you can go for other materials like porcelain, ceramic and vinyl flooring. However, with vinyl flooring, you will need to be careful not to spill any water because that can ruin the floor.
Repaint The Walls
The walls of the kitchen are also like the floor; they can get dirty because of all the cooking. If your kitchen has a good ventilation system, then it will stay clean. However, for some people, their walls and floors can get black because of the cooking and oil vapors.
Repaint your walls after every few months. It will give your kitchen a fresh look. The walls can begin to chip away, as well. Repainting them every once in a while will make sure there is no paint residue on the floor.
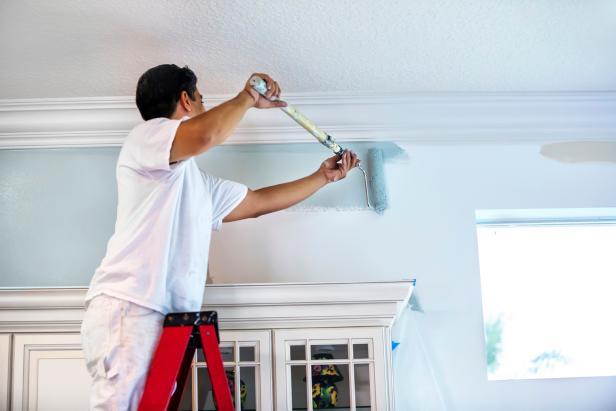
Sand the walls as it will remove the roughness and clean away the dirt. After you clean the greases, paint the walls.
With this list, make a plan today about how you are going to revamp your kitchen!
Author Bio:
Andrea Taylor is a human resource expert with over 10 years’ experience helping HR managers and employees create better work relations. She’s also an avid freelance writer who has been published in online magazines and cooperate websites. When she is not engaged in HR developments, she loves hitting the road to see new places and exploring new gadgets. She regularly writes blogs at https://productspy.co.uk/.
If your kitchen sink sprayer is starting to malfunction, it might be time to replace it with a new one. Don't worry, replacing a kitchen sink sprayer is a fairly easy process that can be done in just a few easy steps. All you need is a new sprayer, a basin wrench, a pair of pliers, and a few other basic tools. Before you start, make sure to turn off the water valves beneath your sink to prevent any leaks or accidents. We'll walk you through the process of how to replace your kitchen sink sprayer, from removing the old sprayer and hose to installing the new one and securing it in place with a mounting nut.
Removing The Old Kitchen Sink Sprayer: Tools And Steps
To remove the old kitchen sink sprayer, you'll need a few tools like a pair of pliers and a basin wrench. Start by turning off the water supply valves beneath the sink to avoid any water leakage. Next, locate the old sprayer and hose beneath the sink and use the pliers to loosen the mounting nut that holds it in place. Once the mounting nut is loose, you can unscrew it by hand and remove the old sprayer and hose. Make sure to pull the sprayer and hose through the hole in the sink and then simply feed the hose out of the sink. If you need to replace the entire sprayer, make sure to purchase a replacement with a new sprayer hose attached. If you're only replacing the old sprayer nozzle, detach the old sprayer from the hose by turning counterclockwise and replace it with the new one. Afterward, tighten the hose onto the new sprayer and secure it with pliers to prevent any leaks. Before turning the water back on, make sure to run some water through the sprayer to soften the tubing and to flush out any debris.
Installing The New Kitchen Sink Sprayer: Step-By-Step Guide
If you're looking to replace your old kitchen sink sprayer, here's a step-by-step guide to help you install a new one:
First, turn off the water supply to your sink by shutting off the valves underneath the sink.
Next, remove the old sink sprayer by unscrewing the hose connector nut that attaches the sprayer to the hose from the faucet. Use one pair of pliers to hold the sprayer steady while you use another pair of pliers to unscrew the nut counterclockwise.
Once you've removed the old sprayer, disconnect the hose from the faucet by unscrewing the hose connector nut at the end of the hose. Pull the old sprayer and hose out from underneath the sink.
Take your new sprayer and hose assembly and connect the hose onto the diverter on the faucet. Make sure the hose is secure by tightening the hose connector nut with pliers.
Thread the other end of the sprayer hose through the sink deck and find the sprayer housing tailpiece underneath the sink. Attach the hose to the tailpiece by screwing on the hose connector nut and tightening it with pliers.
Once the hose is securely attached, snap the sprayer housing into place on the sink deck. Wrap the spray hose around the sprayer and attach the sprayer head and hose to the end of the hose.
Turn on the water supply to the sink and test the new sprayer. Make sure there are no leaks or loose connections. Use pliers to tighten any connections if necessary.
By following these steps, you can easily replace your old kitchen sink sprayer with a new one. This simple home improvement project can save you money on a plumber and give you a fully functional sink sprayer in no time!
Testing The Sprayer Of New Kitchen Sink : Final Steps
Once you have installed the new kitchen sink sprayer, you'll want to test it to make sure it's working properly. Here are the final steps:
Turn on the water supply to the sink and let it run for a few minutes to flush out any debris or air in the lines.
Next, turn on the sink and the new sprayer to test the water pressure and make sure the sprayer is working properly.
Check for leaks or drips at the hose connection and at the sprayer head. Use pliers to tighten any connections if necessary.
If you installed a new deck fitting, make sure it's securely in place and flush with the sink surface.
If everything looks good, give the sprayer a thorough test by spraying water around the sink and on dishes or cookware.
Finally, check the hose and connections beneath the sink to make sure they are secure and not leaking. You can also check the water pressure at the hose connection to ensure it's strong and consistent.
By following these steps, you can test the new kitchen sink sprayer and ensure that it's working properly. If you encounter any issues, you may need to check the hose connection or sprayer head and make sure they are properly installed. With a little patience and some basic plumbing skills, you can replace your old kitchen sink sprayer and enjoy the convenience of a fully functional sprayer in your kitchen.
Conclusion
Replacing a kitchen sink sprayer can be a simple and cost-effective way to improve the functionality of your kitchen sink. By following a few easy steps, you can replace an old or malfunctioning sprayer with a new one, allowing you to enjoy the convenience and versatility of a fully functional kitchen sprayer. From removing the old sprayer to installing the new deck fitting, and testing the sprayer to ensure it's working properly, this process is straightforward and requires only basic plumbing skills. With a new sprayer in place, you can tackle your kitchen tasks with ease and efficiency, making your daily routine a little bit easier.
Frequently Asked Questions (FAQs)
If you’ve still got questions about How To Replace A Kitchen Sink Sprayer, then these may help:
How Do You Replace A Kitchen Faucet Sprayer Hose?
To replace a kitchen faucet sprayer hose, start by turning off the water supply beneath the sink. Next, use pliers to remove the old sprayer hose from the faucet nipple and the sprayer head. Then, install the new hose by connecting it to the sprayer head and faucet nipple, making sure it's securely in place. Finally, turn on the water supply and test the sprayer to make sure it's working properly. If there are any leaks or drips, use pliers to tighten connections and ensure a secure fit. This simple process can be completed in just a few minutes, improving the functionality of your kitchen sink.
Can You Replace A Sink Sprayer Head?
Yes, Replacing a sink sprayer head is quite straightforward. First, you'll need to locate the sprayer replacement hose connected to the faucet beneath your kitchen sink. To remove the sprayer, pull the hose from the end of your sink and find the connection that secures it to the faucet. You'll want to turn this counterclockwise to remove it. Once you have successfully unscrewed it, you can replace the sprayer with a replacement side sprayer head that's found at most hardware stores. Once you have secured your new side sprayer head, simply reattach it by reversing your previous steps - screwing on clockwise until secure. Make sure to test out your new side sprayer before replacing any additional items beneath the kitchen sink!
How Do You Replace A Spray Diverter?
Replacing a spray diverter is quite simple and can usually be done in less than an hour. To begin, turn off the water supply to the faucet and then use a pair of pliers to unscrew the sprayer hose from its connection to the sink. Next, you will need to disconnect the end of your hose from the existing sprayer head. Once this is done, you can replace the sprayer with a new one by securing the hose to the faucet and then connecting it to the end of your replacement sprayer hose. Finally, attach the end of your replacement sprayer hose to its base before screwing it back into place at the end of your existing sprayer hose. Once all these steps have been completed, you should test out your new diverter by turning on the water supply to ensure it works properly.
How To Replace A Sink Sprayer Base?
Replacing a sink sprayer base is a fairly straightforward process. First, you'll need to remove the sink sprayer hose from its connection at the faucet. Next, if needed, use an adjustable wrench to loosen and remove the mounting nut that holds the sink sprayer base in place. Carefully lift out the old sprayer base and replace it with a new one. Then reattach the mounting nut, making sure it's tightened securely so there are no leaks. Finally, reconnect the sink sprayer hose to the faucet. For extra safety, you may want to apply plumber's tape around the threads before attaching and tightening the nut that secures it onto your faucet fixture. With these steps completed correctly, your new sink sprayer should be ready to use!
