

How to Shingle a Gambrel Roof
How To Shingle A Gambrel Roof - Guide To Install Shingles For Roof Transition
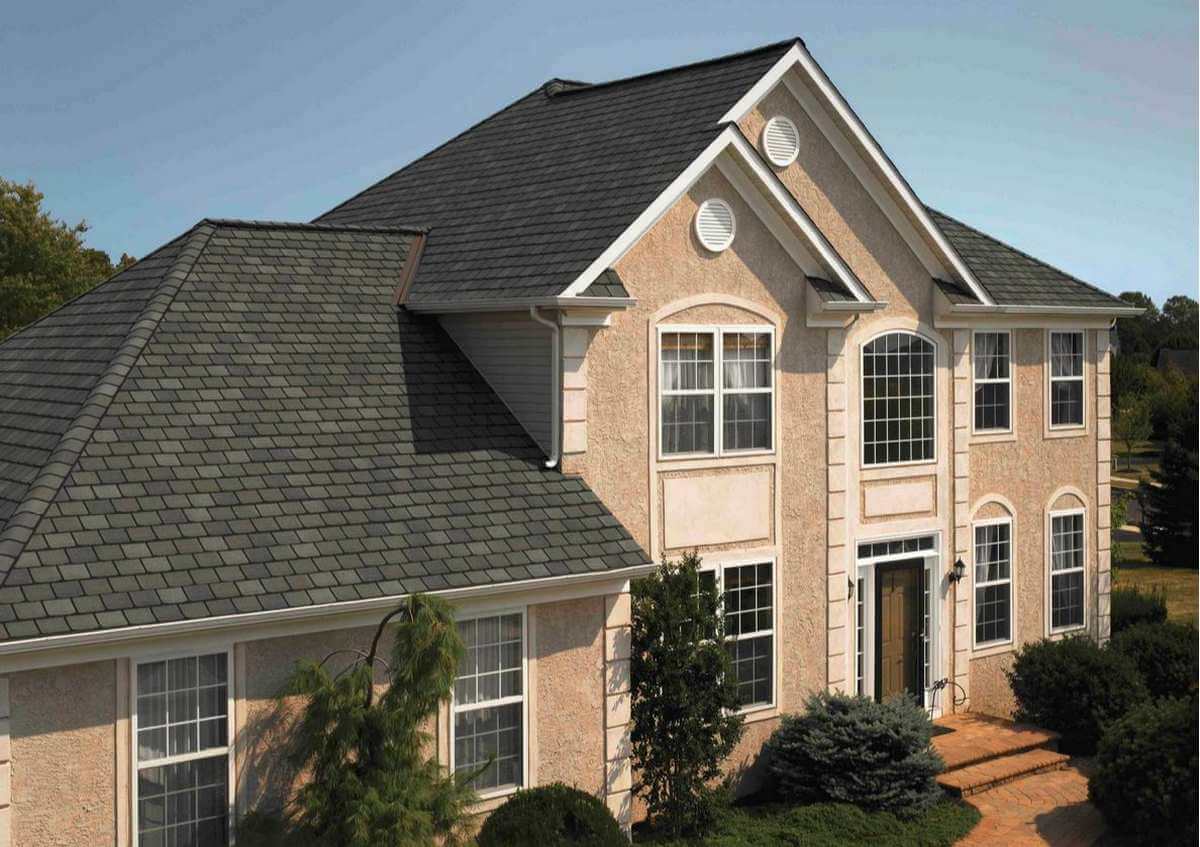
Installing roof shingles is not an easy job, even more so if you have an unconventional building structure like an old home or barn with a gambrel roof. A gambrel roof is characterized by two symmetrical slopes making up each side of a structure‘s roof. This makes it seem difficult for individuals who want to fix and attach new shingles on each roof’s slope.
But fret not, this article aims to provide a step by step guide on how to shingle a gambrel roof. Also you can learn more at hip roof shed.
The term gambrel originated in Europe and houses with this type of roofing were originally called curb roof or mansard roof. In the 18th century, the gambrel roof became a fixture in most American homes and architectural design. These days, gambrel roofing is mostly seen in old homes, historical buildings, and old farm barns.
Soure: roofcalc.org
Steps on How to Shingle a Gambrel Roof
Preparation
1. Gather all tools needed. You will need the following tools: hammer or nail gun, step ladder, tape measure, string or any kind of measuring tool, and extension cord (if you will be using an electric nail gun).
2. Prepare all materials and supplies. You will need: the roof shingles or tiles, nails, and ridge caps.
3. Make sure that the roof has been thoroughly cleaned and all old shingles have been removed completely.
4. Also inspect the roof trusses to ensure the safety and integrity of the new roof that you will be installing.
During Installation
1. Select a side of the roof where you want to start.
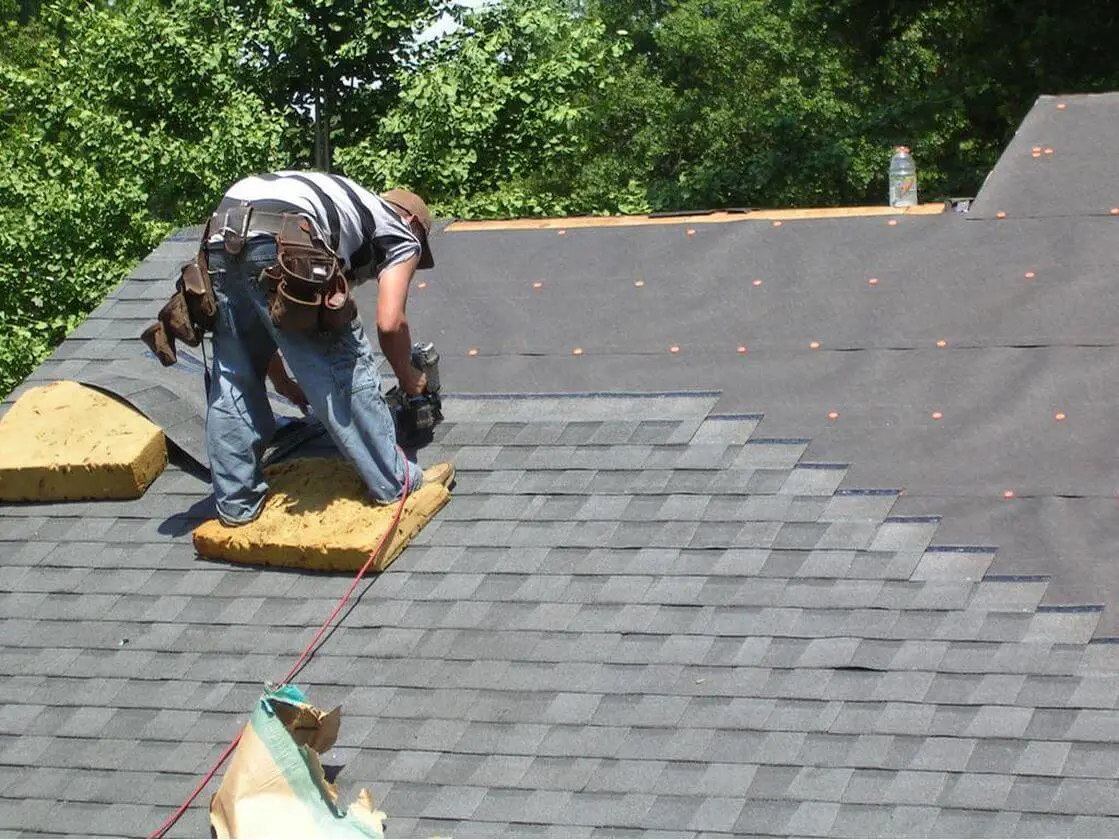
2. Then begin nailing down the roof shingles at the bottom portion of the roof slope in one row. The nails are usually placed on the top part of the rectangular shingle. One row of completed nailed in shingles is called a course.
Soure: www.roofcalc.org
3. Follow the same steps to create the second row or course.
4. When installing the shingles for the second row, allow the bottom portion of the second row shingles to overlap with the top portion of the shingles on the first row.
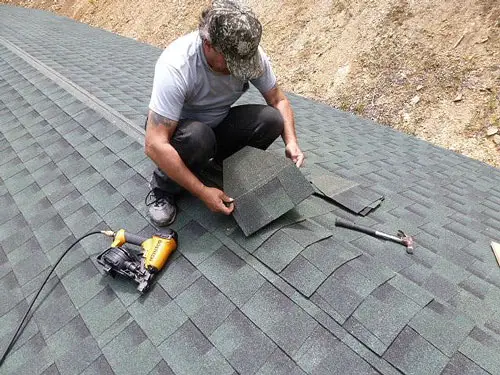
5. Begin the third row by cutting a roof shingle in half, then nailing it down as the first shingle of the third row. Roof shingles for gambrel type roofs are usually made out of wood, asphalt, or slate but may also be made from fiber cement or metal. Any of these materials can be easily cut in half. You can use a knife to score a portion on the shingle and then manually breaking the shingle into your desired size.
6. Continue nailing down each row of shingles while making sure you alternate the first shingle of each row with a precut shingle. Doing this step will give your gambrel roof a gradient design.
7. When you reach the end of a slope, just continue laying down a row of roof shingles on top of the prior row. Roof shingles will follow the contour of the slope over time.
8. When you reach the peak of the roof, use the ridge cap on top of the previous row of shingles.
Soure: dayusroofing.com
9. Repeat the steps on the other side of the roof.
During Installation
1. Inspect the gambrel roof for any sign of loose shingles. Reinforce these loosely nailed shingles by nailing into them again.
2. Remedy any minor alignment issues by cutting into the affected roof shingles.
3. Allow some time for roof shingles positioned on or near slopes to gradually mimic the natural shape of the gambrel roof.
4. Admire your work. Pat yourself on the back for a successful DIY gambrel roof installation.
Tips for DIY Roof Shingle Installation
When installing roof shingles for gambrel type roofs, the DIYer should practice beforehand. This way you will be prepared for the real task and finish it quickly.
It is also a good idea to employ the help of another person as your assistant. This way, you do not have to repeatedly go up and down the ladder to gather the roof shingles. An assistant may also help you determine the alignment of the shingles without you leaving your spot on the roof.
If you are doing the installation of roof shingles alone, do not forget to bring water bottles and sunscreen. Staying long under the sun may cause heatstroke and sunburn.
Most importantly, always follow safety precautions in any carpentry task. Wear harnesses and/or safety head hear since you will be staying on an elevated area.
Making home improvements is now easier with the collective knowledge of carpentry and architecture mostly available online. With diligent research and practice, you can even renovate your own house. Or you can hire anyone with roof installation knowledge easily through online research. Either way, it will be to your advantage. Hopefully, this short guide has helped you learn how to shingle a gambrel roof.
A gambrel roof is a type of roof with two slopes on each side, creating a unique and attractive architectural style. Installing asphalt shingles on a gambrel roof can be a challenging roofing job, but with the right steps and tools, you can create a beautiful and durable roof. We’ll go over the steps on how to shingle a gambrel roof, including choosing the right shingles, preparing the roof, and laying out the shingles. We’ll also provide tips and tricks to make the process smoother and ensure a successful roofing project. Before beginning, it’s important to familiarize yourself with the manufacturer’s specifications and determine how many square feet of shingles you’ll need for your roof. Get ready to install the gambrel roof shingles and follow our step-by-step instructions for a successful roofing project.
Understanding The Gambrel Roof
The Gambrel roof is a type of roof design that has two different slopes on each side, creating a distinctive architectural style. The upper slope of the roof is typically steeper and the lower slope is shallower, providing additional headroom and storage space. The two slopes extend from the ridge of the roof to the eaves, creating a bend or arch in the roof. This design is often used in barns, colonial homes, and other structures in the southeastern United States. When installing shingles on a Gambrel roof, it’s important to choose the right roofing material, such as asphalt shingles, and follow the manufacturer’s specifications. The shingles should be flexible enough to bend and follow the different slopes on each side, and should be secured with adhesive and galvanized nails. The process of installing shingles on a Gambrel roof involves laying out a row of shingles and overlapping them to cover the section of roof. The shingles should be trimmed to fit the roof and follow the second layer of shingles to ensure a tight seal. The process of installing shingles on a Gambrel roof can take a full day or more, so it’s important to plan ahead and follow the instructions carefully for a successful roofing project.
Preparing For Shingling
When preparing for shingling a gambrel roof, it is important to consider the pitch, or steepness, of the roof. The gambrel roof has two different slopes, with the upper slope being steeper and the lower slope being shallower. Before installing the shingles, it is important to bend them to match the shape of the roof. This can be done by using a shingle that is more flexible, such as an architectural shingle. On the day of installation, make sure to have all the necessary materials, including the shingles, adhesive, and underlayment, ready. Start by laying the shingles at the end of the roof and overlapping them to cover the entire section of the roof. Make sure to follow the manufacturer’s specifications and place the shingles according to the top row and slope. Continue laying the shingles, making sure to seal the end-to-end placement with tarred adhesive. The flexibility and durability of the shingles will ensure a successful roofing job.
Choosing The Right Shingles
When choosing shingles for a roof, consider the following factors:
- Slope of the roof: A steep roof requires shingles that can bend without breaking, while a shallow roof may only need shingles that can cover a wide area.
- Time to install: Some shingles can be installed faster, saving time on the job.
- Flexibility: Shingles that are more flexible are better suited for roofs with curves or bends.
- Roof type: Different roof types (e.g. barn roof) may require specific types of shingles.
- Shingle tab: The size and shape of the shingle tab affects the overall look of the roof.
- Climate: Shingles perform differently in different climates (e.g. sunny day in Delaware vs New Jersey).
- Pitch: Lower pitched roofs may require shingles that are more flexible and can handle the slope.
- Square footage: The amount of shingles needed will depend on the size of the roof, measured in “100 square” units.
- Tools: Installing shingles may require a razor blade or other tools.
Shingles are also known by different names such as “asphalt shingles,” “composite shingles,” or “architectural shingles.” It’s important to select the right shingles for the specific roof, taking into account the lowest cost and highest quality options available.
Installing The Starter Course
When installing the starter course for shingles on a roof, the following steps should be followed:
- Determine the slope of the roof: The slope of the roof will help determine the number of shingles needed to cover the roof and if the shingles need to be flexible to bend with the slope.
- Measure and cut the shingles: The shingles should be cut to the correct size and shape to fit the roof and ensure that they are installed end to end.
- Apply the first row of shingles: The first row of shingles, also known as the starter course, should be applied to the roof. It is important to make sure that this row is straight and level.
- Bend the shingles: If the slope of the roof is typically steep, it may be necessary to bend the shingles to fit the roof properly.
- Apply additional shingles: The next row of shingles should be applied, ensuring that they overlap the shingles in the starter course. Repeat this process until the roof is completely covered.
- Consider the time to install: Installing shingles can take several days, depending on the size of the roof.
- Check for proper installation: After the shingles have been installed, check for proper installation and make any necessary adjustments.
By following these steps, the starter course for shingles can be installed correctly and efficiently, ensuring a strong and durable roof.
Laying Out And Nailing The Shingles
When laying out and nailing shingles to a roof, the following steps should be followed:
- Measure the roof: Measure the length and width of the roof to determine how many shingles will be needed to cover it.
- Cut the shingles: Cut the shingles to size, if necessary, so that they will fit properly on the roof.
- Apply the shingles: Begin at the bottom of the roof and apply the shingles, ensuring that they overlap and are straight.
- Nail the shingles: Nail each shingle securely to the roof, following the manufacturer’s guidelines for spacing and placement.
- Consider the slope: If the slope of the roof is typically steep, shingles that are more flexible may be needed to fit properly on the roof.
- Check for proper installation: After nailing the shingles to the roof, inspect the work to ensure that they have been installed properly.
- Consider the time to install: Installing shingles can take several days, depending on the size of the roof.
By following these steps, shingles can be properly laid out and nailed to the roof, providing a strong and durable covering.
Finishing The Roof
After installing shingles on a roof, there are several steps to take to finish the roof properly:
- Inspect the shingles: Check that all shingles have been installed correctly and that there are no gaps or overlaps.
- Seal the shingles: Apply a sealant to the shingles to help protect them from the elements and to keep water from seeping through.
- Trim any excess: Trim any excess shingles that may be hanging over the edge of the roof.
- Check the slope: If the slope of the roof is typically steep, inspect the shingles to make sure they fit properly on the slope.
- Consider the time to install: Installing shingles can take several days, depending on the size of the roof, so it is important to plan accordingly.
- Clean up the site: Clean up the site, removing any debris and materials that were used during the installation.
By following these steps, the roof can be finished properly after shingle installation, providing a strong, durable and weather-resistant covering.
Conclusion
In conclusion, shingling a gambrel roof is a challenging but rewarding task that requires careful planning and attention to detail. The process of shingling a gambrel roof involves determining the slope of the roof, cutting and applying the shingles, nailing them into place, and finishing the roof. It is important to consider the slope of the roof when selecting shingles and to use shingles that are more flexible if the slope is typically steep. Additionally, it is important to plan for the time it will take to install the shingles, as the process can take several days depending on the size of the roof. By following these steps, you can successfully shingle a gambrel roof and enjoy a strong, durable, and weather-resistant roof for years to come.
Frequently Asked Questions (FAQs)
If you’ve still got questions about How to Shingle a gambrel roof, then these may help:
How To Install Shingles On A Gambrel Roofs?
Installing shingles on a gambrel roof is a process that can be completed in one day if done correctly. Gambrel roofs typically have two sides with different slopes, making them more flexible when it comes to installing shingles. The first step is to make sure you have enough shingles to cover the entire roof. Once you have all the materials, it’s time to start applying the shingles step-by-step. Begin at the bottom of your roof, overlapping each row as you go higher. Make sure there are no gaps between each row and that they are firmly attached to the roof. Finally, install any additional accessories such as flashing or ridge caps and your gambrel roof will be ready for many years of use and protection from the elements.
How Do You Transition A Gambrel Shingle Roof?
Transitioning a Gambrel Shingle Roof is not a difficult task, but it does involve some special considerations. The first step is to install the shingles with the right pitch. You will need to use more flexible shingles than you would for a standard roof in order to accommodate the lower pitch of a gambrel roof. Once you have applied the shingles, you will need to nail and seal them in place with adhesive. The top row should extend beyond the lowest point of the transition and be nailed down securely. The ridge cap should then be sealed with a flexible sealant. To ensure that the roof transitions properly, make sure that each row overlaps the one below it by at least 1/2 inch. Finally, extend the top row over the ridge line of the roof to create an even transition between the roof and the soffit. This can be done by installing metal flashing along the ridge line and then covering it with the same material as used for the soffit. If possible, match the profile of the soffit to that of the roofing material in order to create a seamless transition between them.
What Are The Disadvantages Of The Gambrel Roof?
The gambrel roof is a type of roof that has two sides with different slopes. The upper slope is steep while the lower slope is much more gradual. While this type of roof can give your home a unique look, it also comes with some drawbacks. One of the main disadvantages to having a gambrel roof is that it takes longer to install than other types of roofs. Additionally, due to the steepness of the upper slope, it requires shingles that are more flexible and expensive than those used on other roofs in order to apply them properly. This means that installing a gambrel roof will be more expensive than installing other types of roofs.
How To Shingle A Hip Roof Ridge?
Shingling a hip roof ridge is a challenging task that requires skill and knowledge of the proper installation technique. First, you will need to measure and cut the shingles so they will fit correctly along the ridge line. Next, you will need to fasten the shingles securely in place with nails or staples, making sure to stagger them between each row. Once all of your shingles are in place, use a roofing cement to seal around each nail head and ensure a watertight seal. After that, you will need to install a cap shingle over the top of the rows of shingles and secure it with nails or staples. Finally, inspect your work to make sure there are no gaps or exposed nail heads that could allow water into your home.
Do I Need Tar Paper Under Shingles On A Shed?
When it comes to deciding whether or not to use tar paper underneath your shingles on a shed, there are several factors to consider. It is best to install the tar paper on the same day that you apply the shingles, as this will help protect the shed from weather damage over time. Additionally, if you have already applied the shingles, adding tar paper may be difficult and impractical due to the fact that shingles are more flexible than tar paper. If you decide to add tar paper after applying the shingles, make sure that it is securely nailed down and overlaps each row of shingles by at least two inches. Ultimately, although tar paper can provide additional protection for your shed, it is not an absolute necessity depending on your particular conditions.
Why Do Barns Have Gambrel Roofs?
Barns have gambrel roofs for a variety of reasons. Firstly, they are easier to install than other types of roofs, such as gable or hip roofs. This makes it easier and faster to build the barn, which is often built on a tight timeline. Secondly, shingles used on gambrel roofs are more flexible and can be applied in many different directions. This makes it much easier to apply the shingles than other types of roofing materials, such as tiles or slate. Finally, gambrel roofs provide better insulation since they create an attic space between the roof and the ceiling of the barn. This provides additional protection from extreme weather conditions like snowstorms or heavy rains. All these reasons make gambrel roofs an ideal choice for barns.
